
How to add a bot to Microsoft Teams without the Azure portal
Registering a Teams bot takes minutes in the Teams Developer Portal and never touches the Azure portal. The upload is where it stalls, and the route that worked at once was an admin adding it to the org's app catalog.
Put an agent in Teams
Nine steps across four tabs
Adding a bot to Microsoft Teams comes down to two jobs in Microsoft's tools: register the bot in the Teams Developer Portal, then upload its app to your organization's app catalog. In between, you connect the bot to whatever runs it, which in this guide is a Clawnify agent. A bot, a chatbot and an AI agent all get into Teams this way, and none of it needs the Azure portal or any code.
You need three things first. A Microsoft 365 work or school account with Teams, because Teams (free), the personal edition, isn't supported. Permission to register apps in that organization, which Microsoft gives every user by default unless IT has switched it off. And an administrator for the upload at the end, unless your organization already lets people install their own apps.
| # | What you do | Where | Watch for |
|---|---|---|---|
| 1 | Copy your tenant ID | Entra admin center, Overview | It's an ID, not a password |
| 2 | Paste it, copy the endpoint address | Clawnify, the agent's Channels | The address appears once the ID is valid |
| 3 | Create a new bot | Developer Portal, Tools, Bot management | Name it after the agent |
| 4 | Paste the endpoint address, save | The bot's Configure page | Save shows no confirmation |
| 5 | Create a client secret, copy it and the bot ID | The bot's Client secrets page | The secret is shown once |
| 6 | Paste both, choose who can reach it, Connect | The agent's Teams panel | Everyone includes guests |
| 7 | Download the Teams app | The same panel | Needs the bot ID filled in |
| 8 | Upload it to your org's app catalog | Teams, Apps, Manage your apps | Needs a Global or Teams admin |
| 9 | Add it, then say hello | Teams, Built for your org | In channels it hears only @mentions |
We ran the whole route on 24 September 2026, with a Clawnify agent and a new Microsoft 365 Business Basic trial. Registering the bot took three minutes. Installing it took fourteen, most of them spent on two routes that turned out to be blocked, which is why the install section starts with the route that works. The screens below are simplified recreations of that run, with a placeholder agent called Ops Assistant and placeholder IDs.
Register the bot in the Teams Developer Portal
1. Copy your tenant ID. Open the Microsoft Entra admin center. The Overview page lists the tenant ID under Basic information, with a copy button beside it. It identifies your organization, and it isn't a secret.
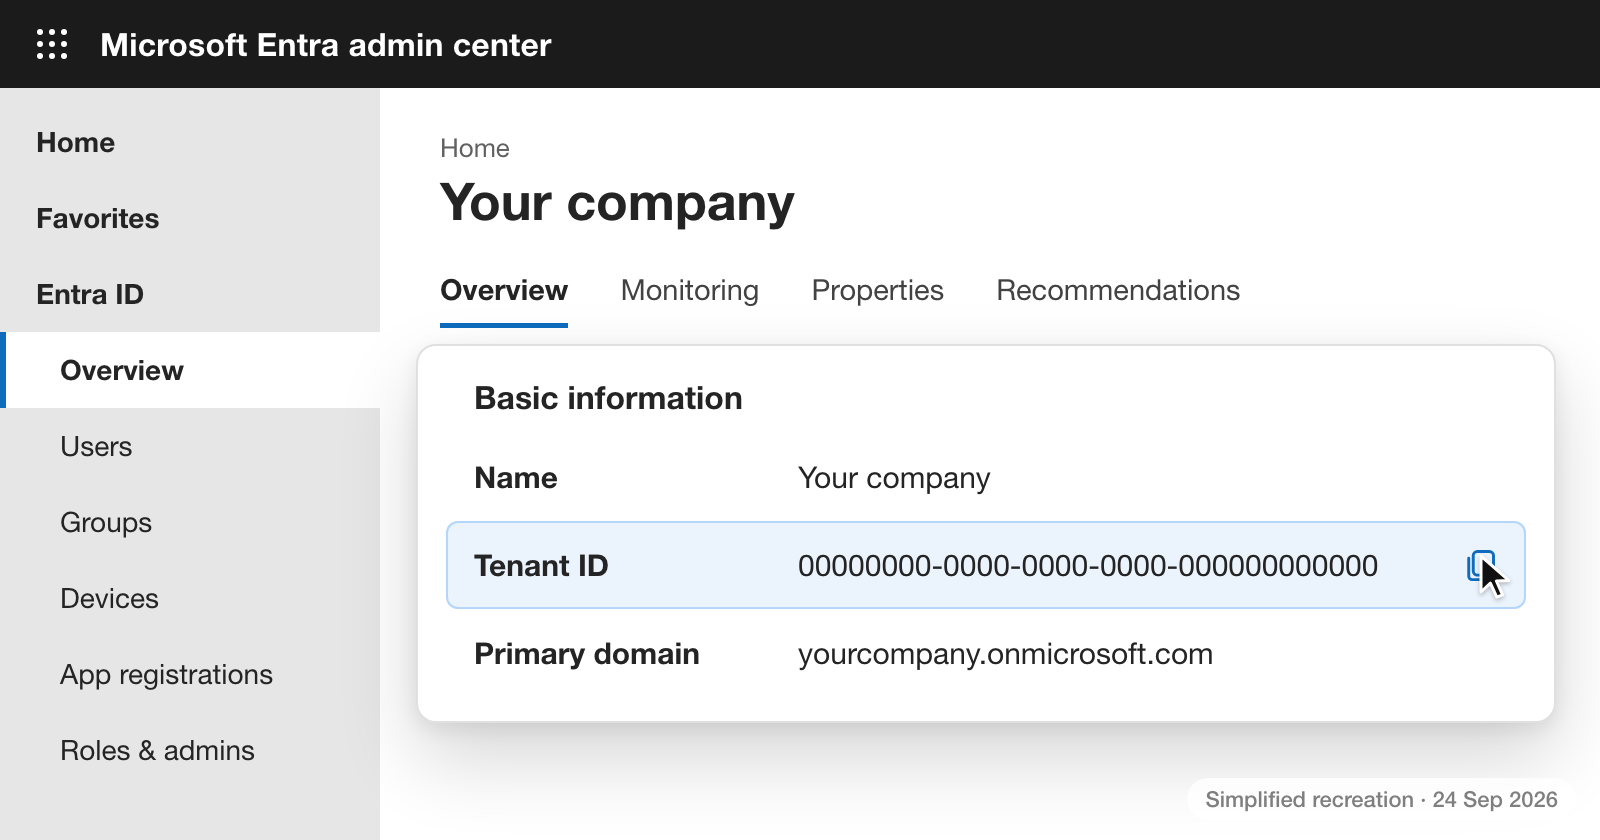
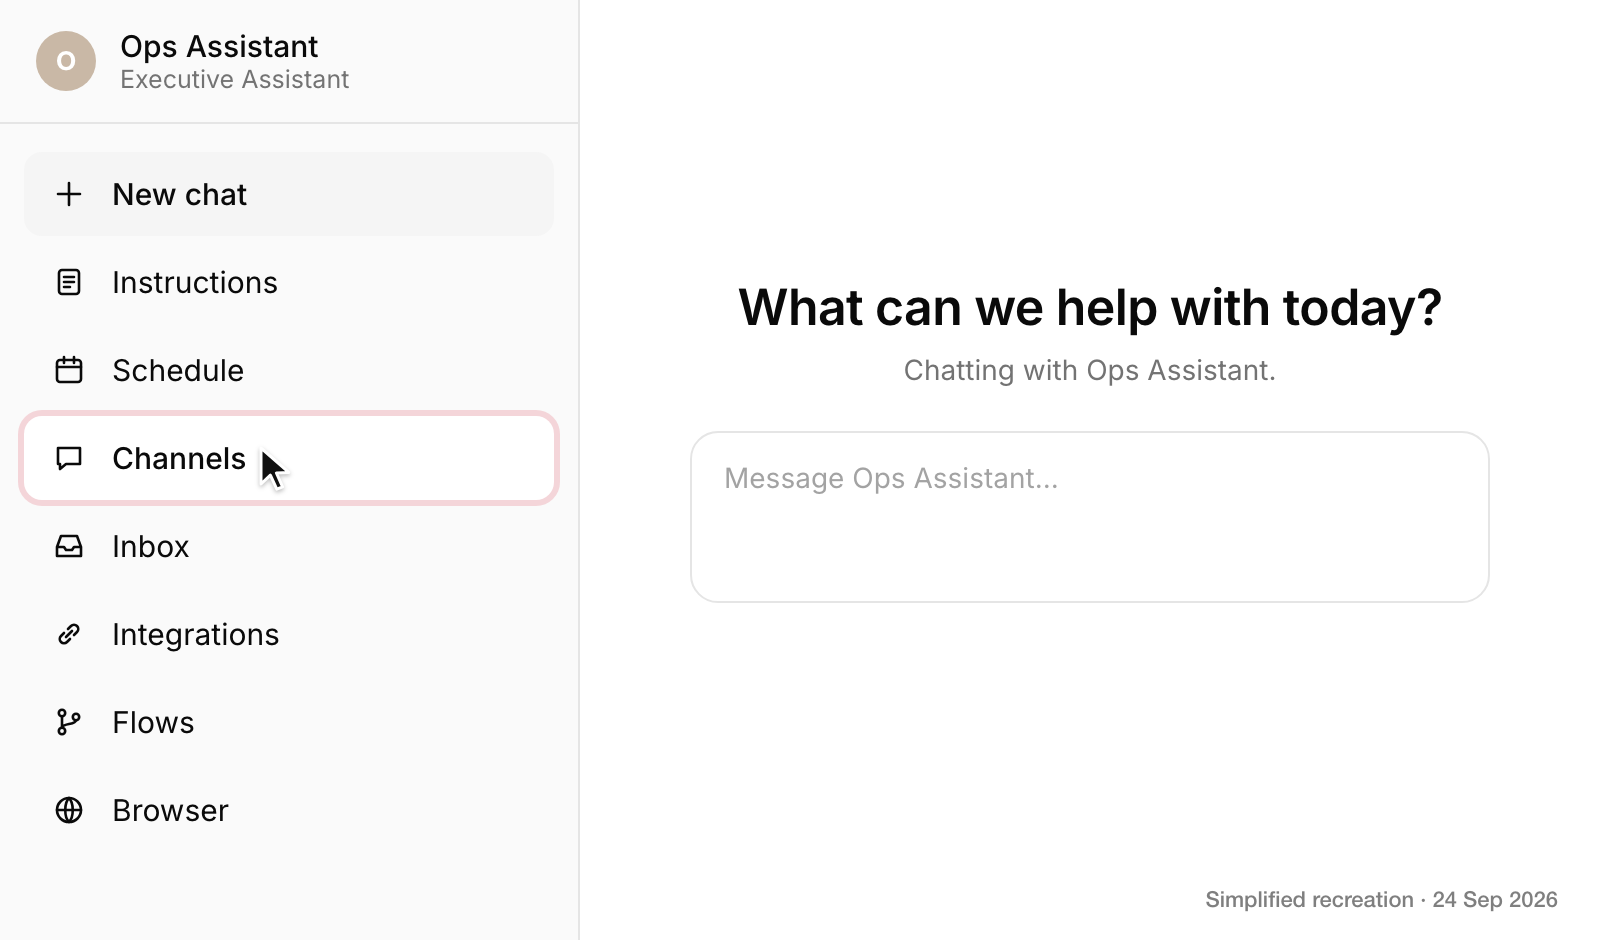
2. Paste it into the agent's Teams panel. In Clawnify, open the agent and choose Channels in its sidebar, then Microsoft Teams.
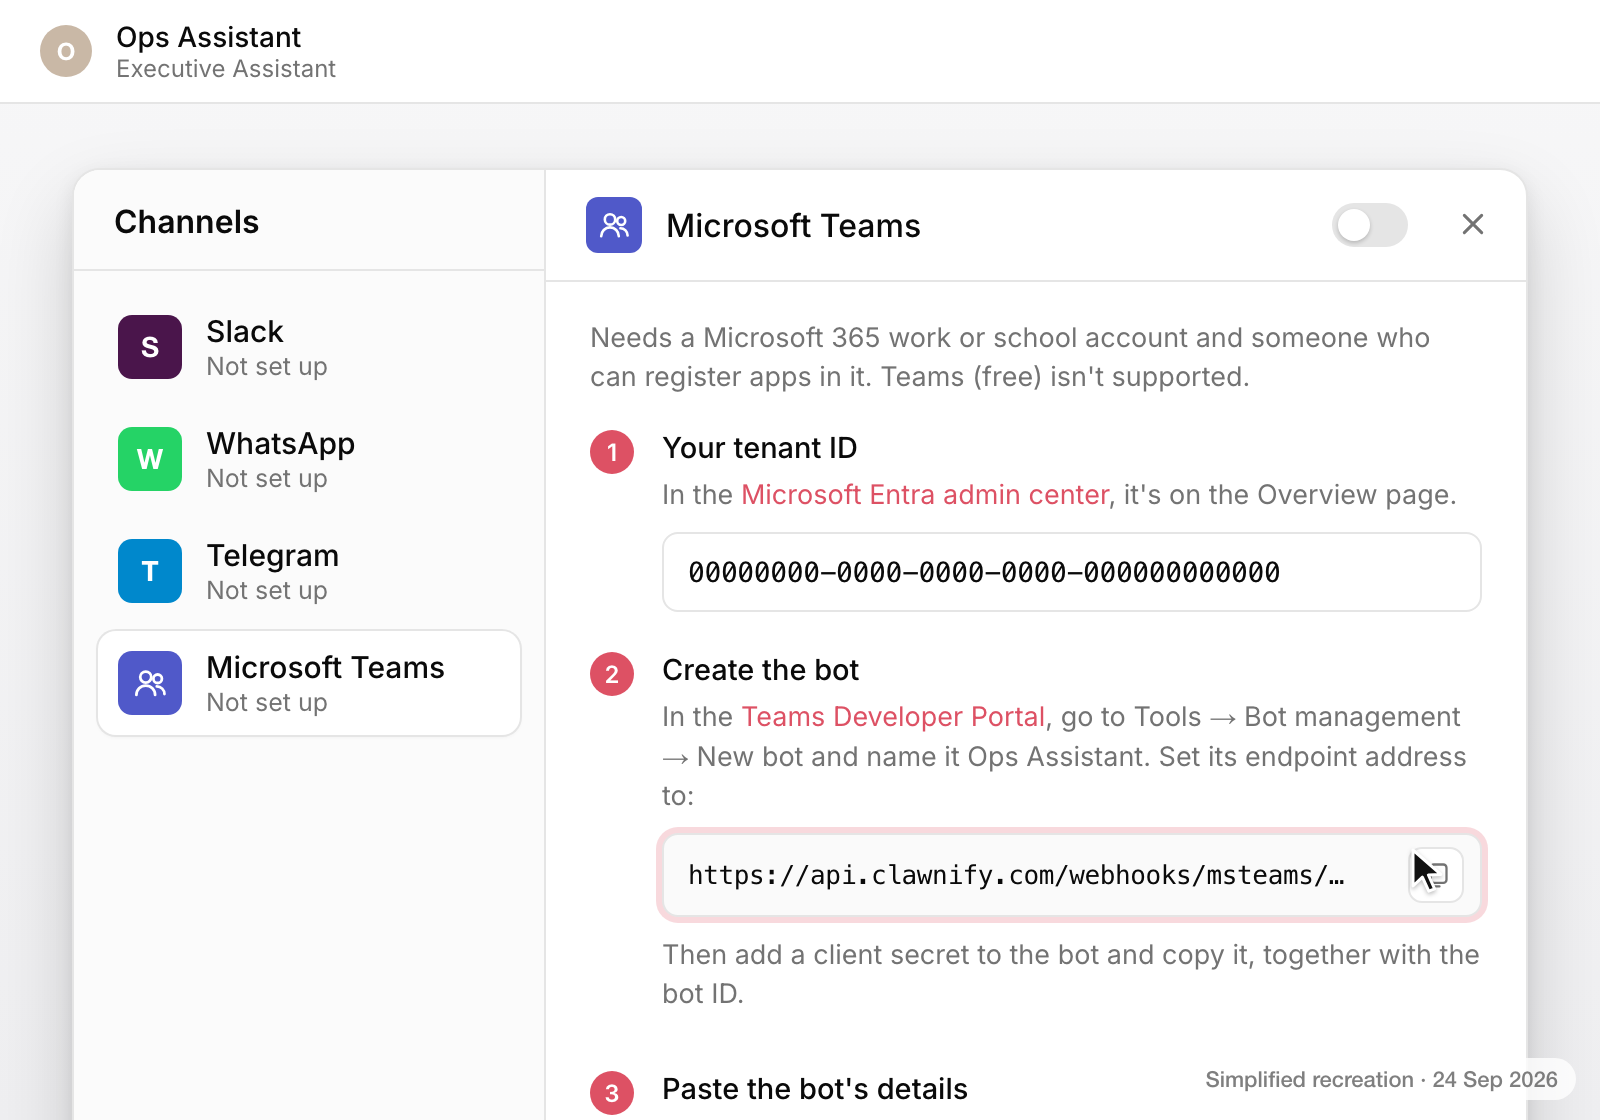
Paste the tenant ID into the first field. The endpoint address appears under Create the bot: the URL where Teams will deliver every message for this agent. Copy it with the button at its end.
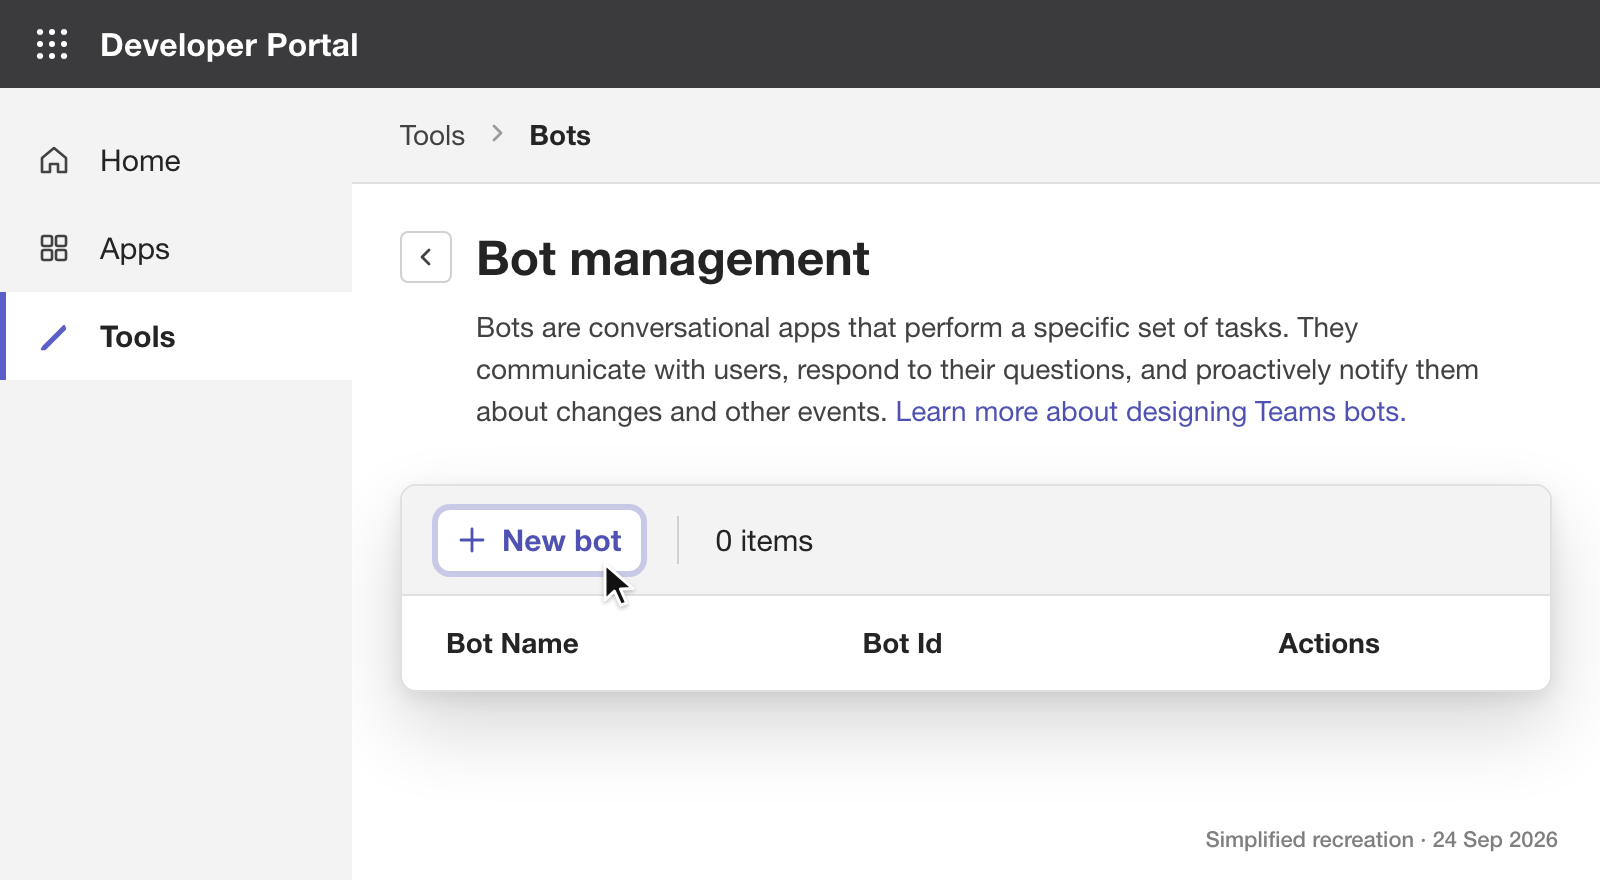
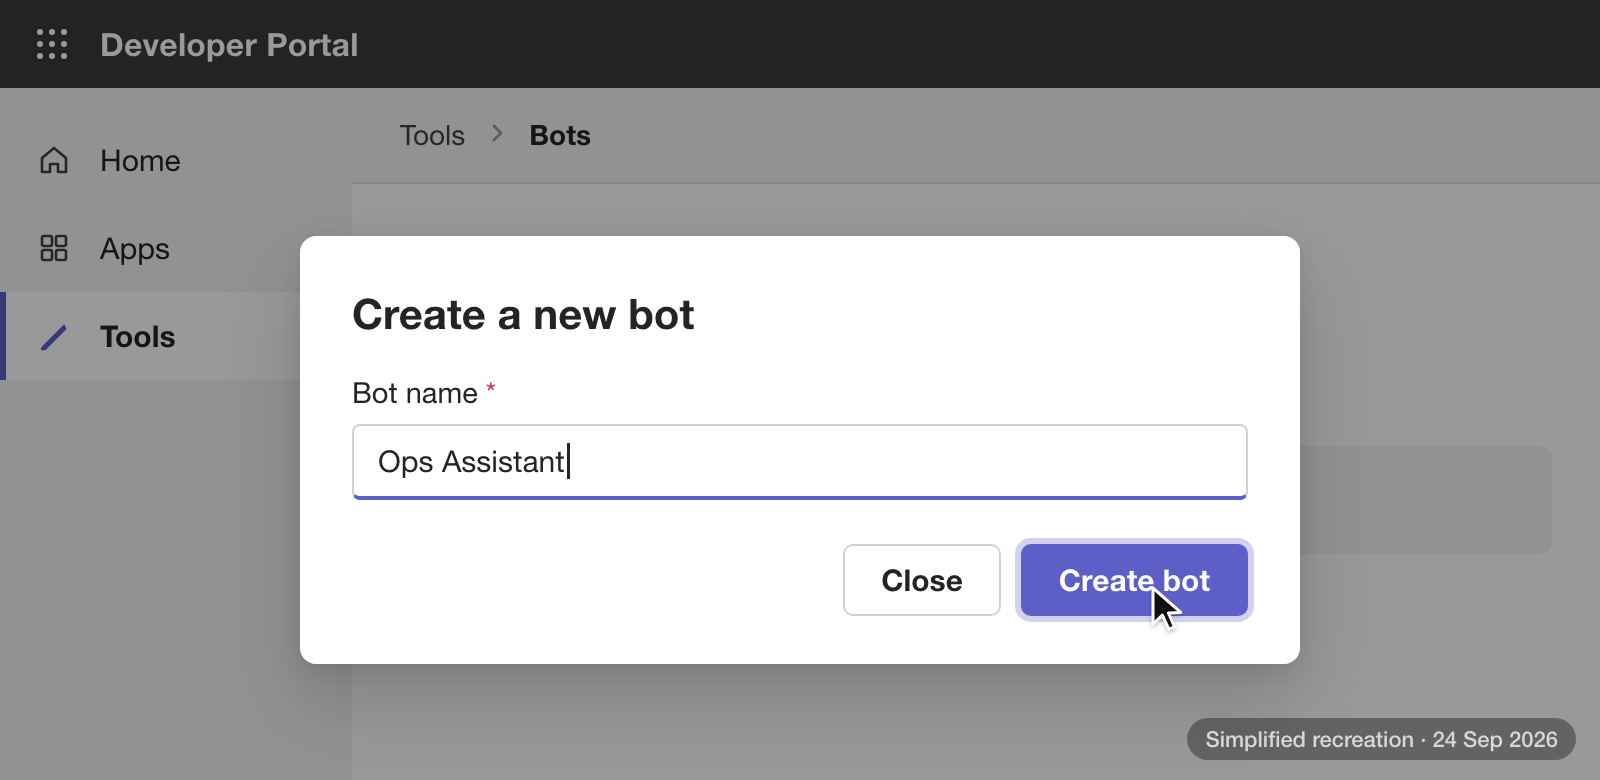
3. Create the bot. In the Teams Developer Portal, open Tools, then Bot management, and press New bot.
Give it the agent's name and press Create bot.
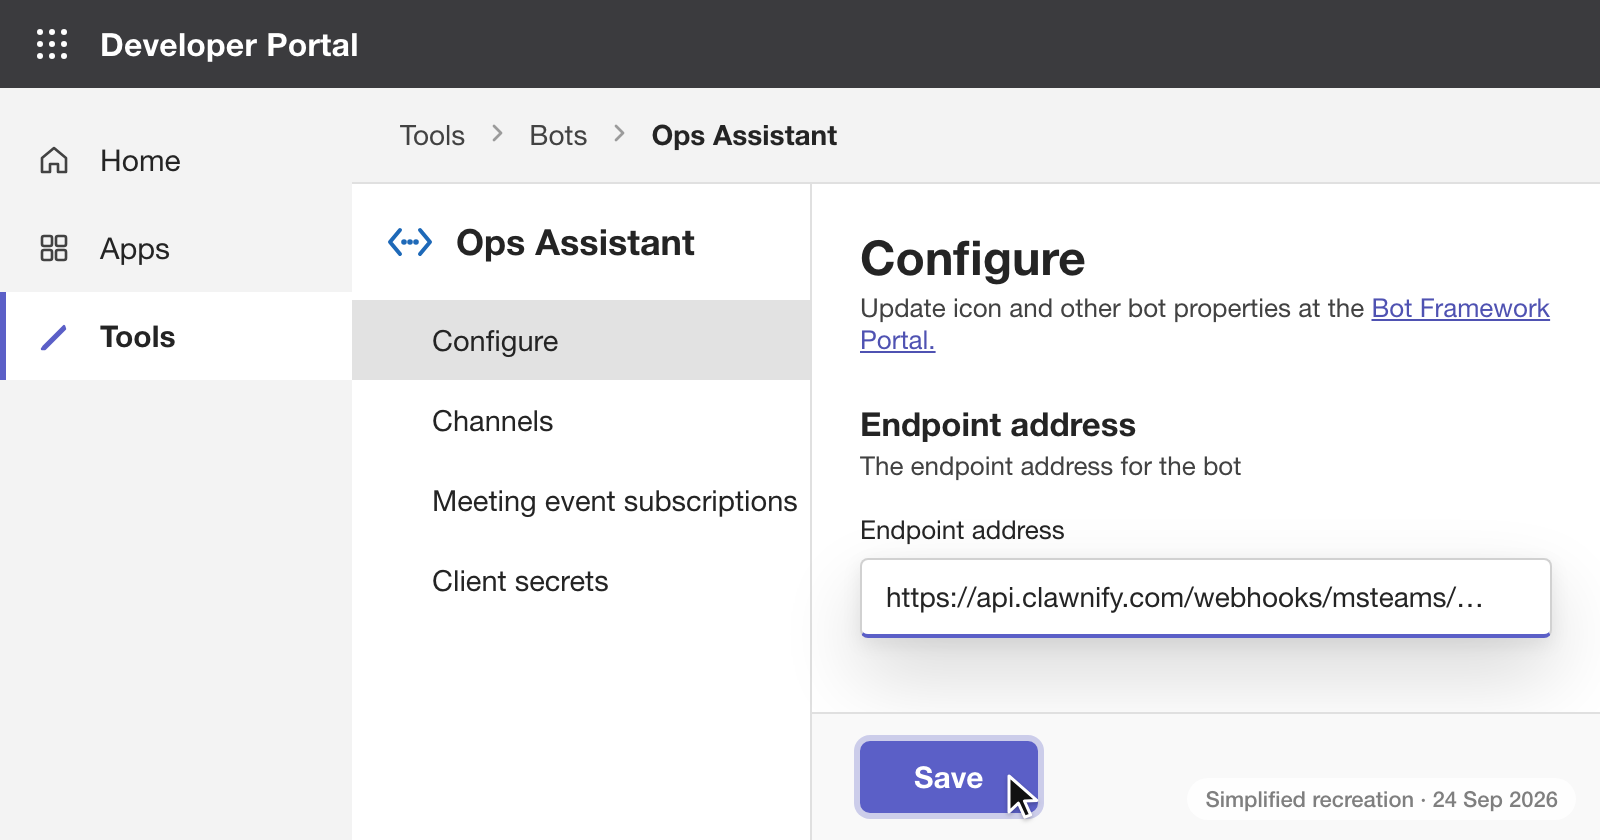
4. Set the endpoint address. The bot opens on its Configure page. Paste the address into Endpoint address and press Save. No confirmation appears, and in our run the address saved anyway. The Channels page already has Microsoft Teams ticked, so there is nothing to change there.
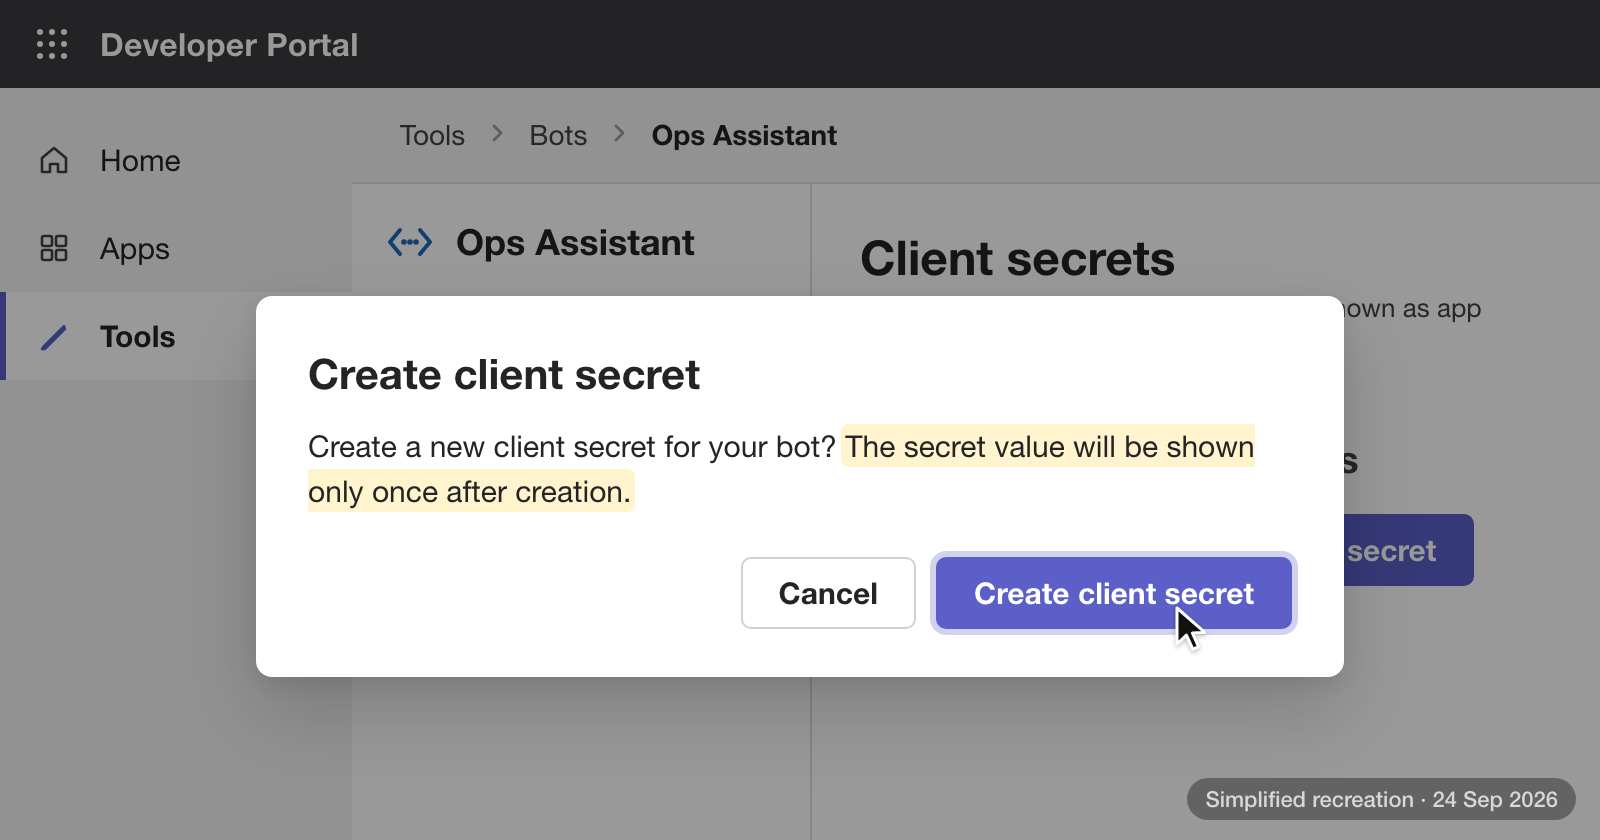
5. Create a client secret. Open Client secrets and press Create your first client secret. Microsoft asks you to confirm, and warns that the secret value will be shown only once. Paste it straight into the agent's panel rather than into a chat or a document on the way. It expires after two years, and a new one from the same page replaces it.
You also need the bot ID. It sits in the Bot Id column of Bot management, and in the address bar of any of the bot's pages, right after tools/bots/.
Connect it, and choose who can reach it
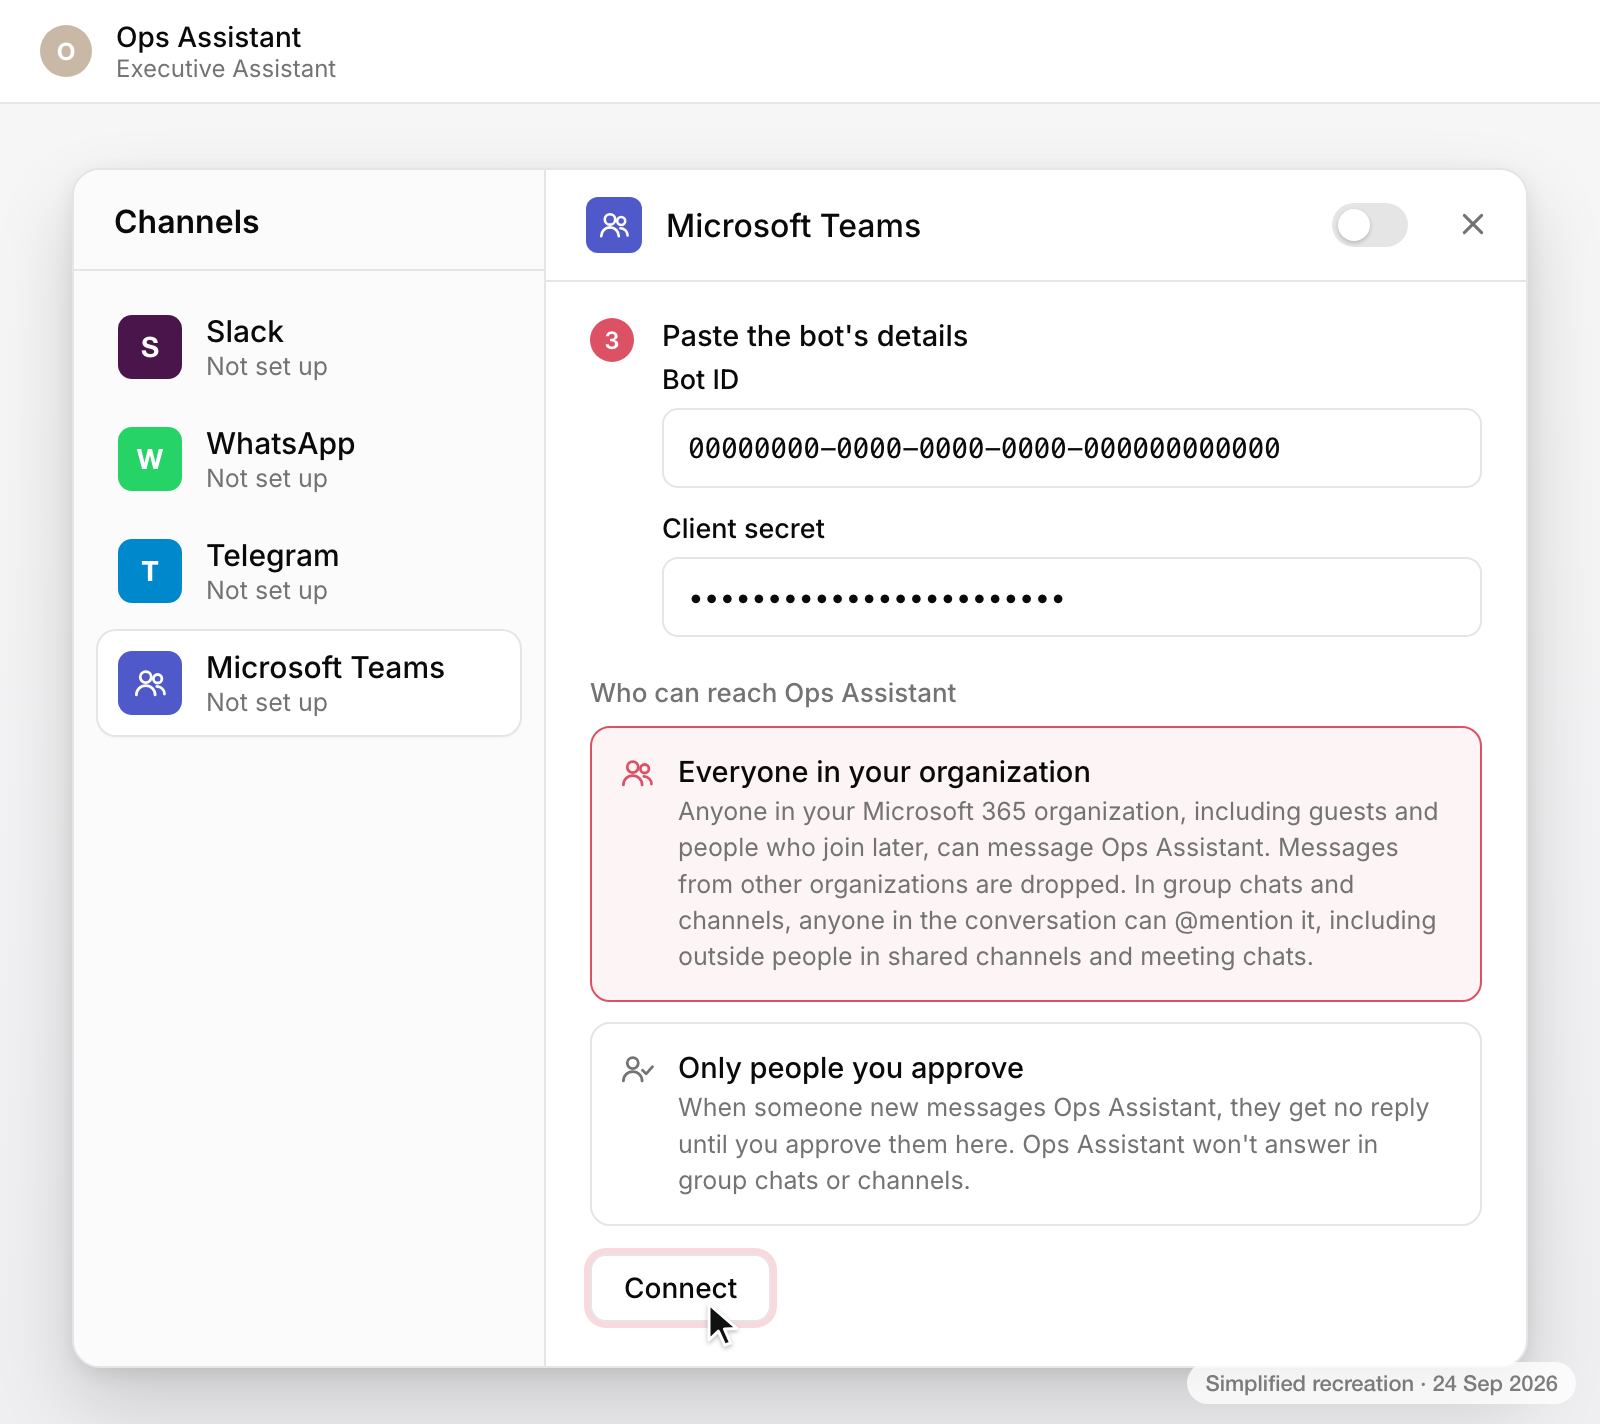
6. Paste the bot's details, and choose who can reach it. Back in the agent's Teams panel, paste the bot ID and the client secret. Below them sits the one real decision in this setup: who the agent will answer. Everyone in your organization is selected to begin with.
| Situation | Everyone in your organization | Only people you approve |
|---|---|---|
| Direct messages | Anyone in the organization, guests included | People you have approved |
| Someone new | Answered straight away | Gets no reply until you approve them |
| Group chats and channels | Anyone there can @mention it | It doesn't answer |
| Outside people in shared channels and meeting chats | Can @mention it | Not answered |
| Conversations in another organization | Dropped | Dropped |
The fourth row is the one to read twice, because Everyone in your organization reaches further than its name suggests. Guests count as your organization, and in a shared channel or a meeting chat, people from outside the company can @mention the agent too.
Choose Only people you approve if the agent can reach anything you wouldn't show a guest. Approvals are per person and cover direct messages, so in that mode the agent stays out of group chats and channels altogether. Someone new gets no reply at all: their first message waits in the agent's Teams panel until you approve them, and nothing tells them when you do, so let them know to write again.
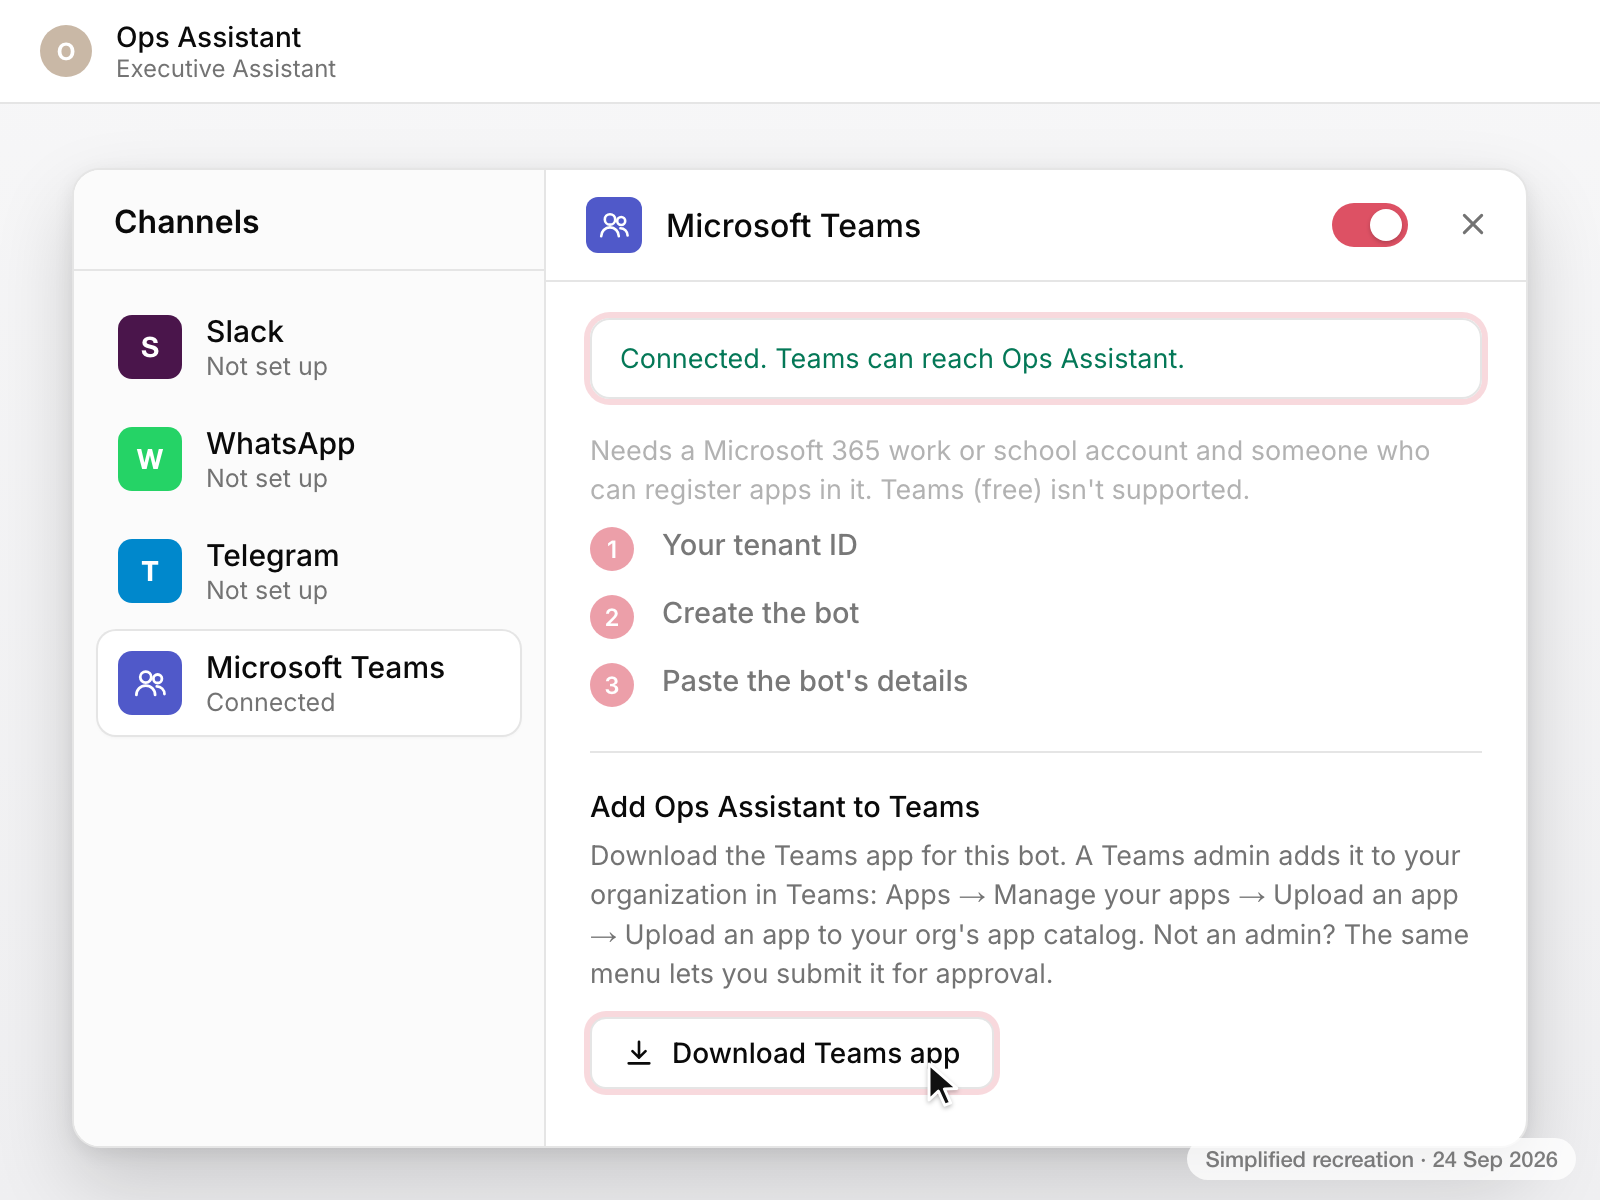
Press Connect. After a short check the panel reports Connected, and that Teams can reach the agent. If Teams reports a problem instead, the panel shows its error and asks you to check the bot ID, the client secret and the tenant ID.
7. Download the Teams app. Under Add to Teams, Download Teams app saves the package Teams installs: a small zip named after the agent, with an icon drawn from its first letter. Keep it for the next step.
Install it through your org's app catalog
8. Upload the app. A custom app has three ways into Teams, and in our new organization two of them were closed.
| Route | What happened | Who can use it |
|---|---|---|
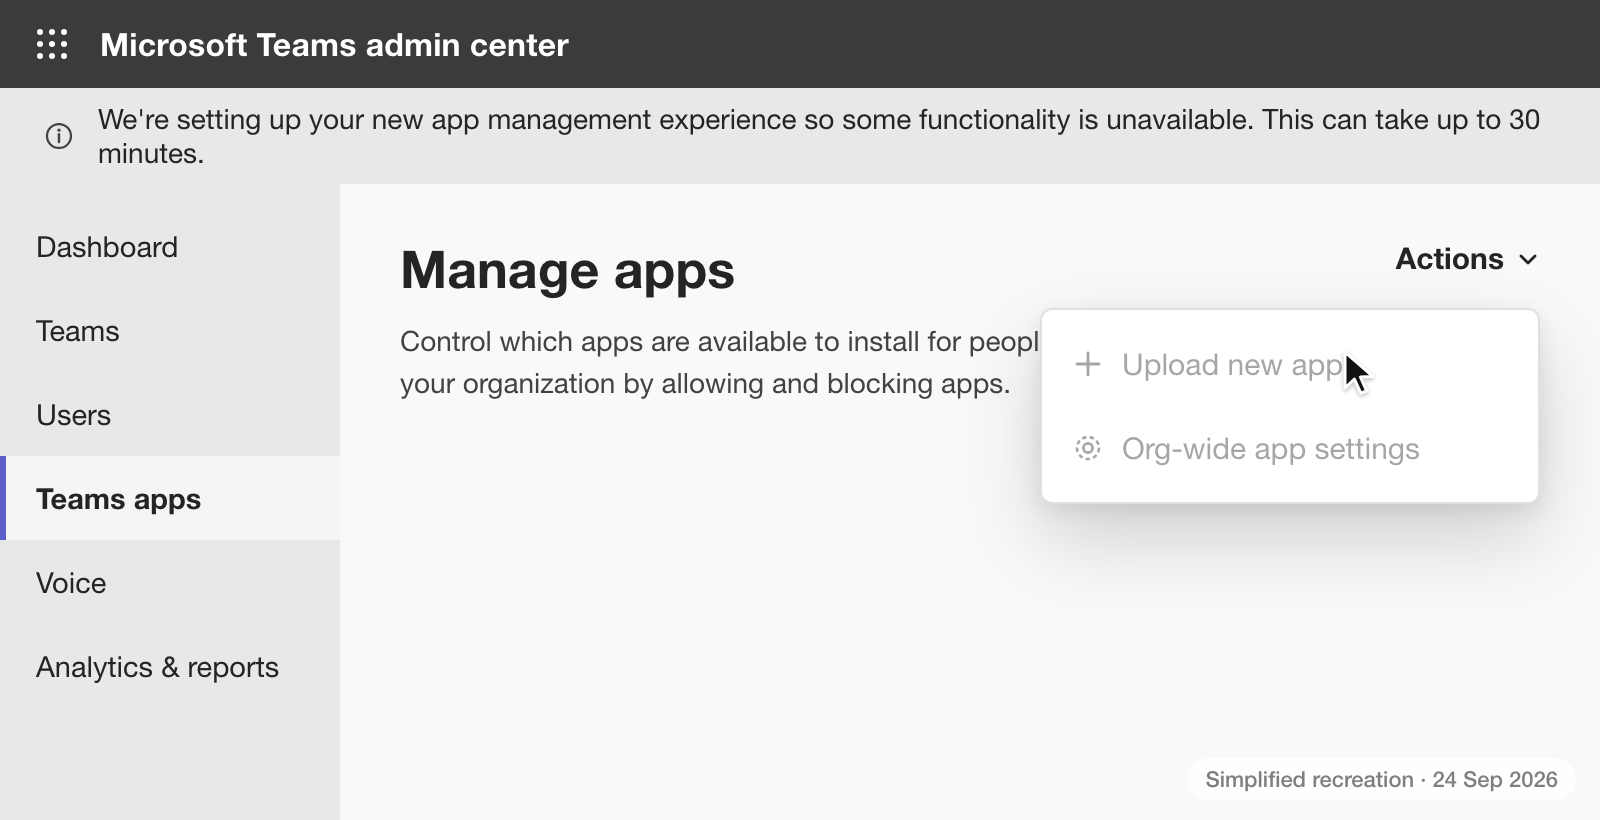
| Admin center, Manage apps, Upload new app | Greyed out for over half an hour while Microsoft set up app management | Global and Teams admins |
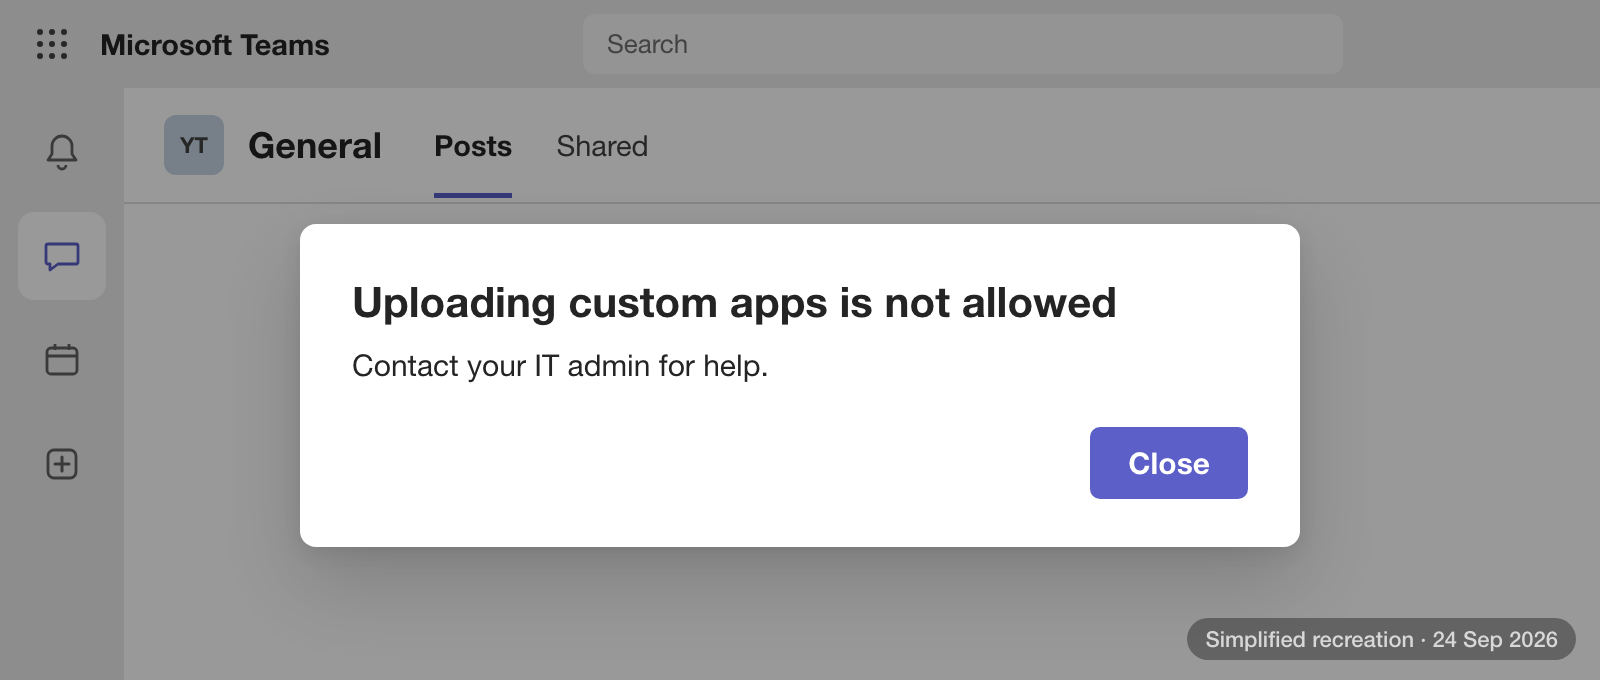
| Upload for yourself, in Teams or from the Developer Portal | Blocked: uploading custom apps is not allowed | Whoever your upload policy allows |
| Teams, Manage your apps, upload to your org's app catalog | Worked at once | Global and Teams admins |
The two that failed looked like this.
The route that works starts in the Teams app itself. Open Apps, then Manage your apps at the foot of the list, then Upload an app, and choose Upload an app to your org's app catalog. Pick the zip you downloaded.
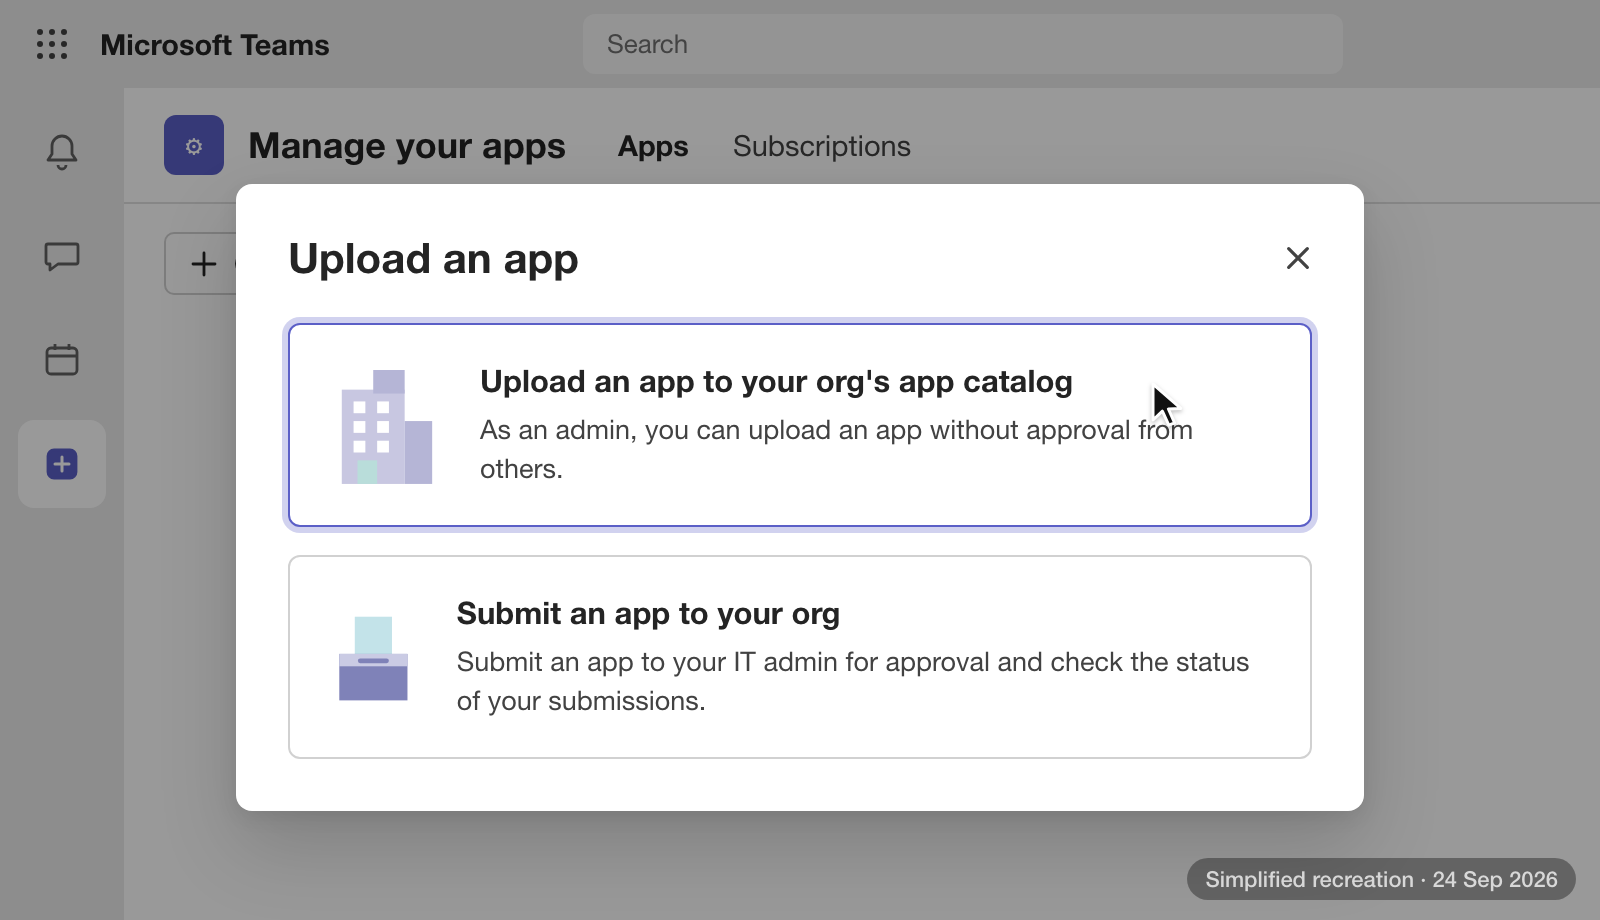
Microsoft's custom app documentation names two routes that an organization can't switch off: an admin uploading to the catalog, which needs no approval, and any user submitting an app for an admin to approve. The dialog's second option, Submit an app to your org, is that second route, so someone who isn't an admin can start the install and leave the last click to IT.
9. Add it. The agent appears under Built for your org.
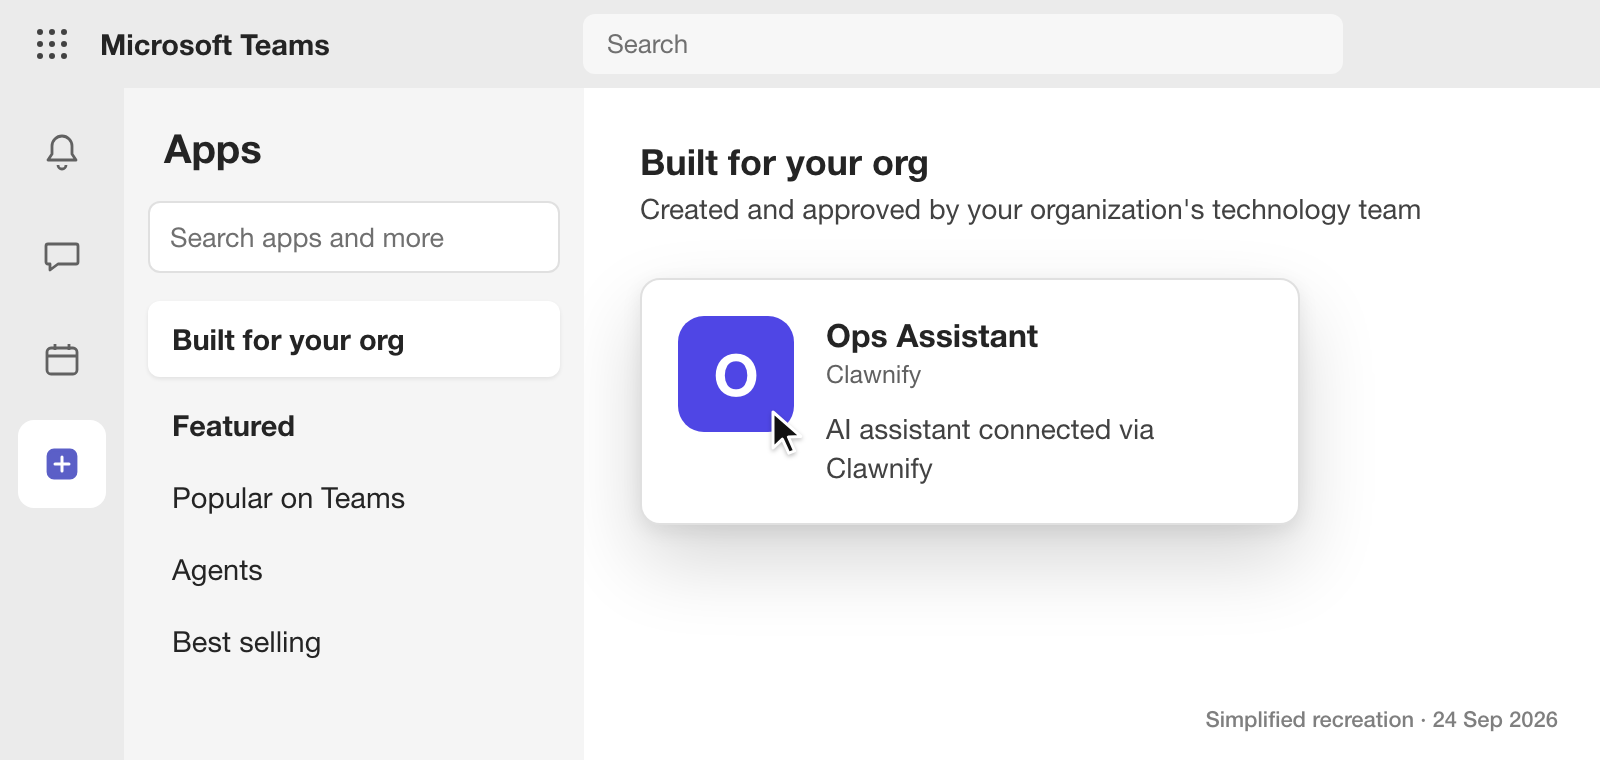
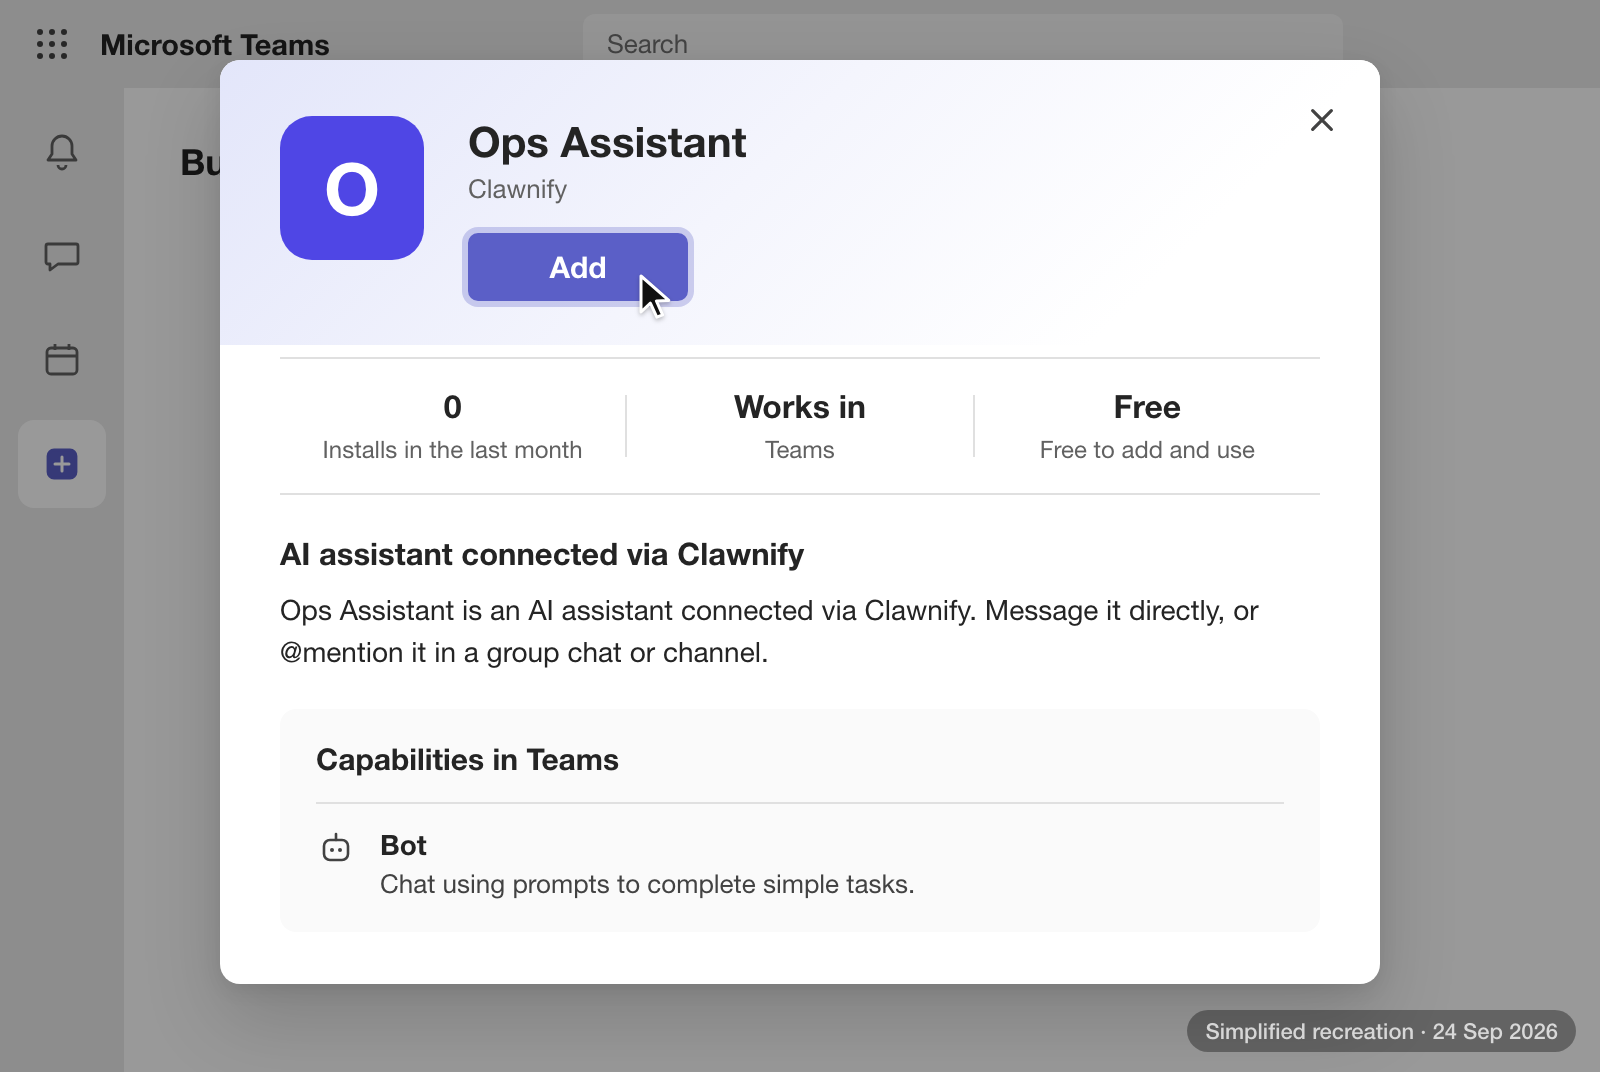
Open it and press Add. If the install dialog says Permissions needed, the app isn't in the catalog yet. Uploaded this way, that warning is gone.
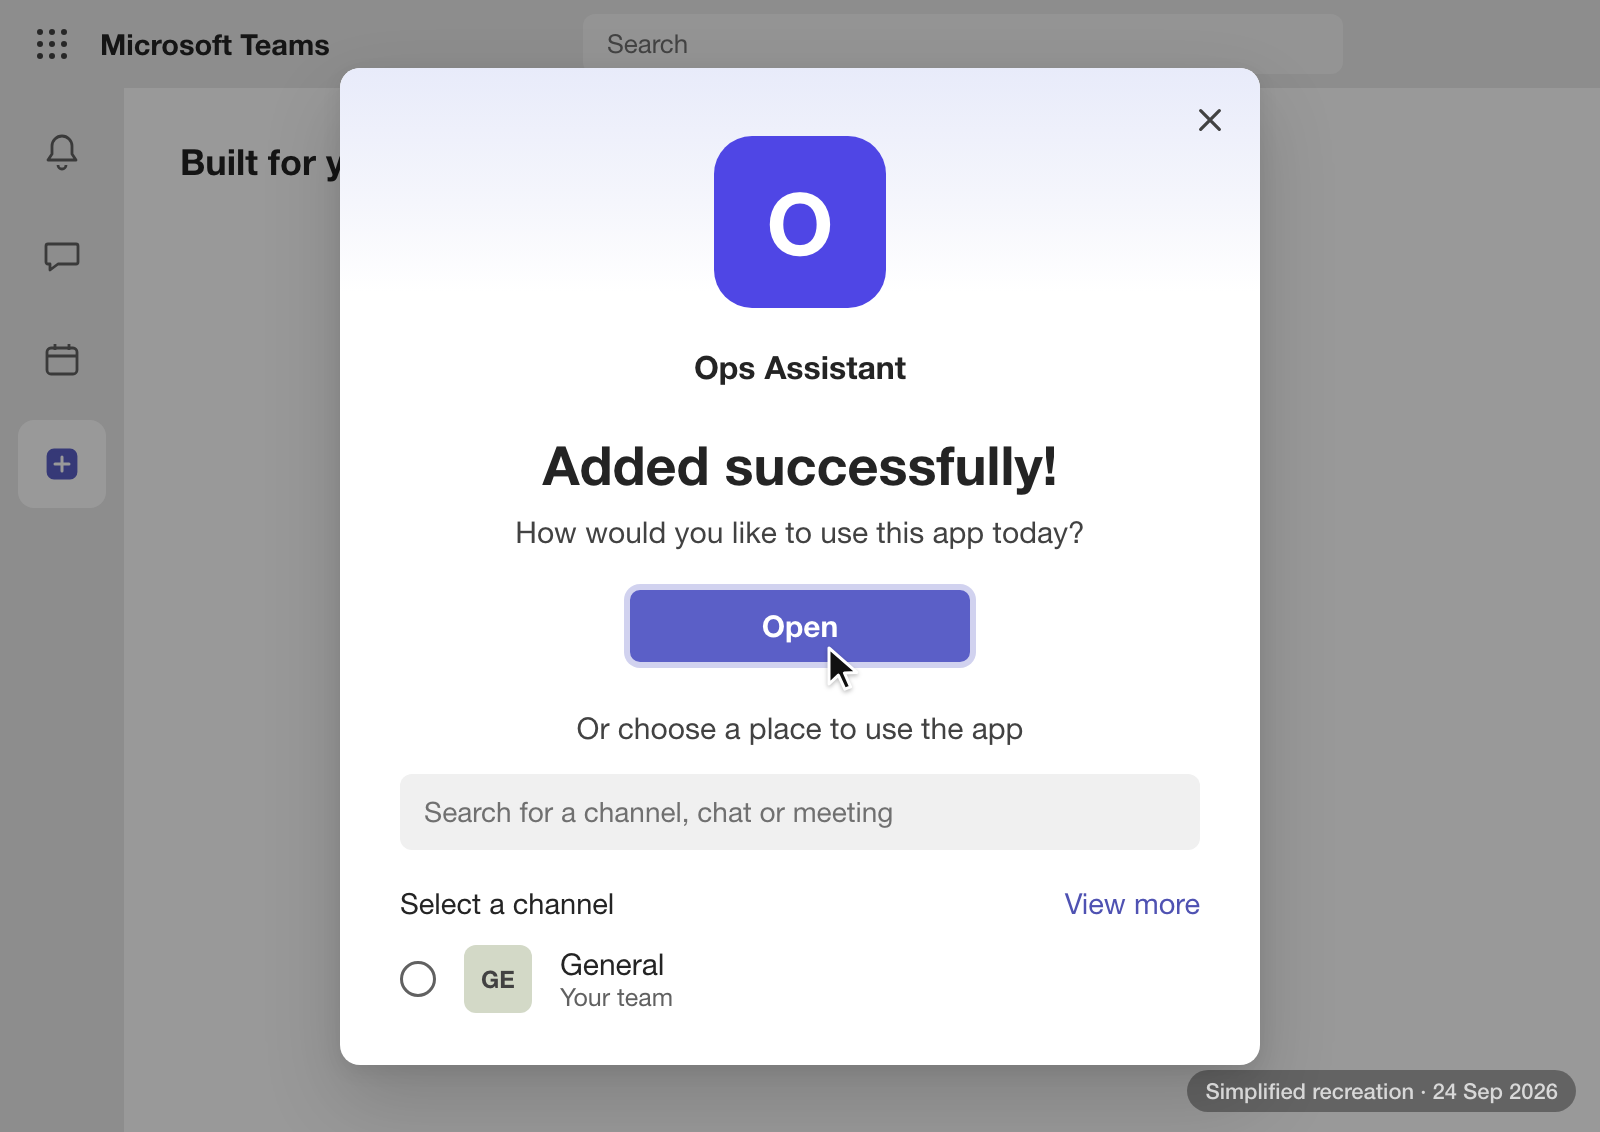
Teams confirms the install and offers two ways in. Open starts a direct chat. Picking a channel and pressing Go adds the agent to that team and starts a post with the @mention already filled in.
It appeared at once for us, as the admin who uploaded it. We didn't time how long it took to reach colleagues, and for uploads through the admin center, Microsoft's documentation allows a few hours. If IT wants to inspect the package before anyone installs it, the Developer Portal's Apps page has Import app, which runs Microsoft's validator. Ours came back with No issues found.
What the first conversation looks like
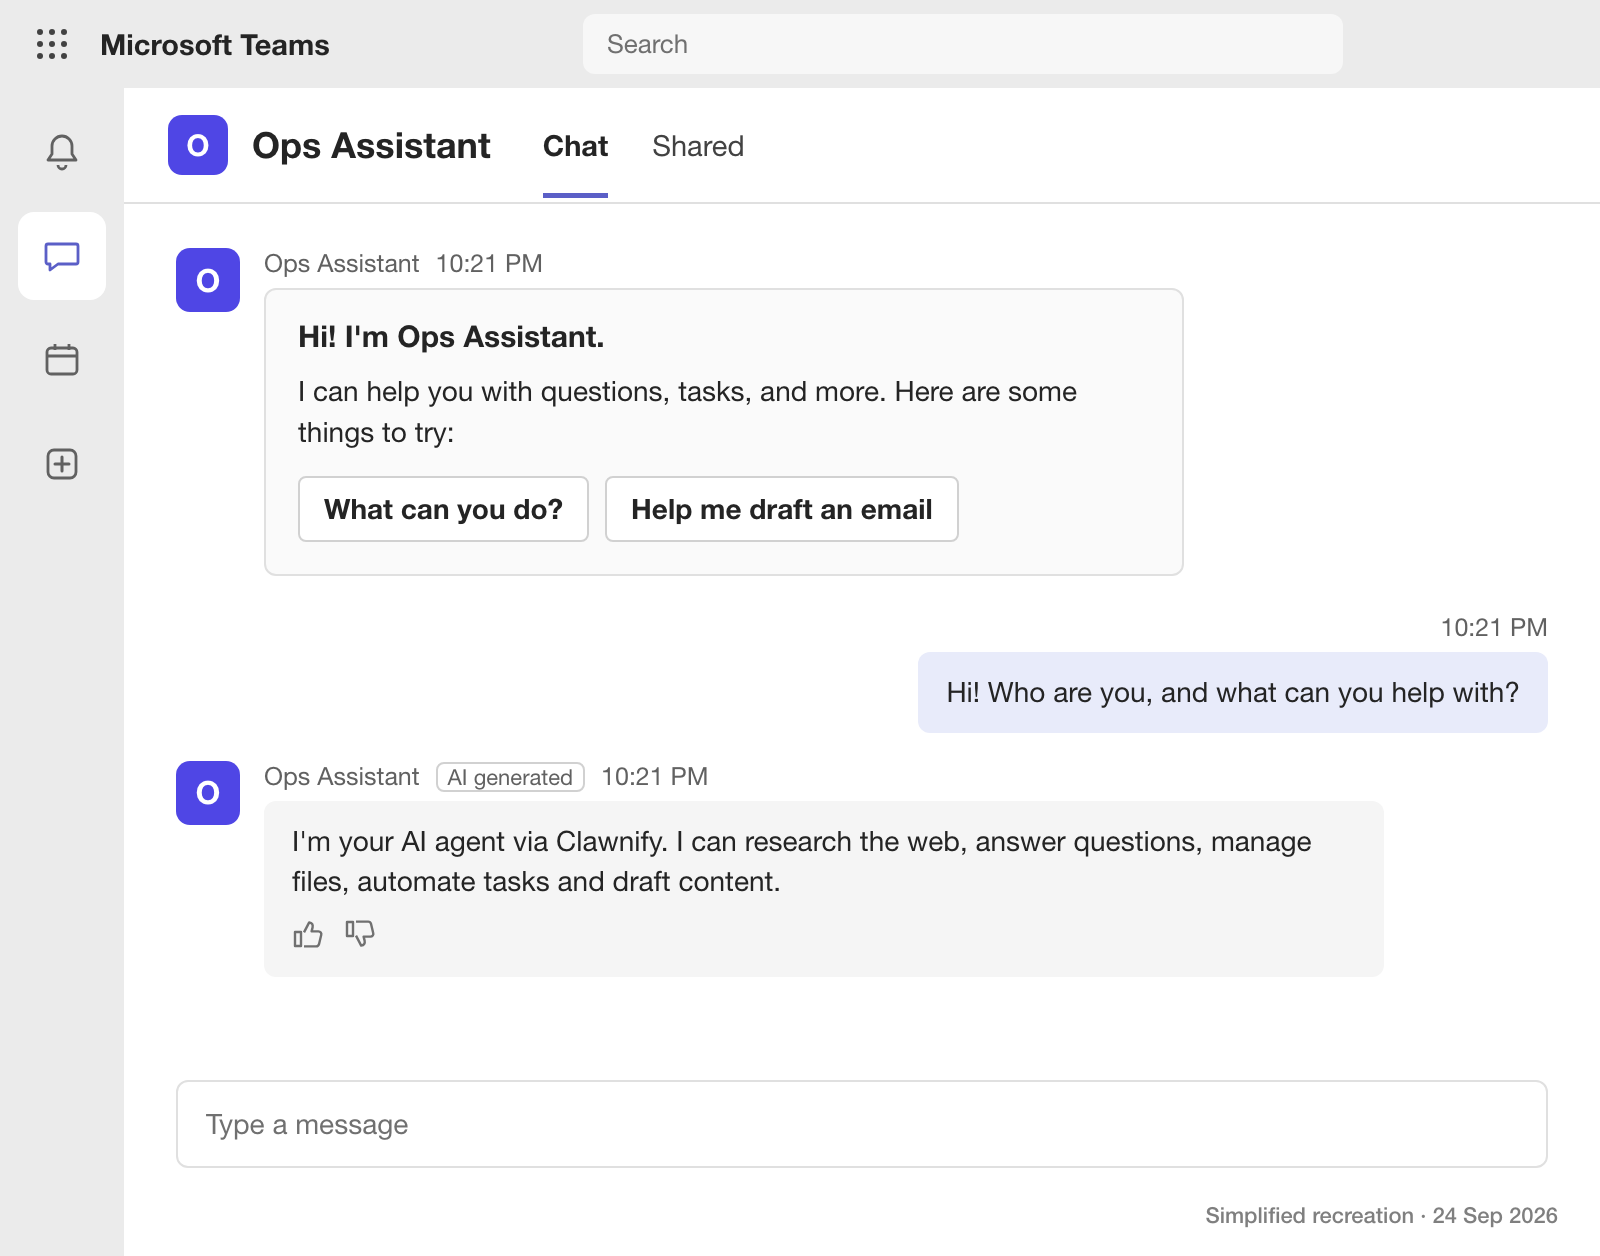
Open the chat and the agent speaks first, with a welcome card that introduces it by name and offers a few prompts to try. Our first direct message got its answer within the same minute, exactly once. Teams labels every reply AI generated and adds thumbs up and down for feedback.
In a channel, @mention it. The reply lands in the thread of the post that mentioned it, quoting the question, so a busy channel stays readable.
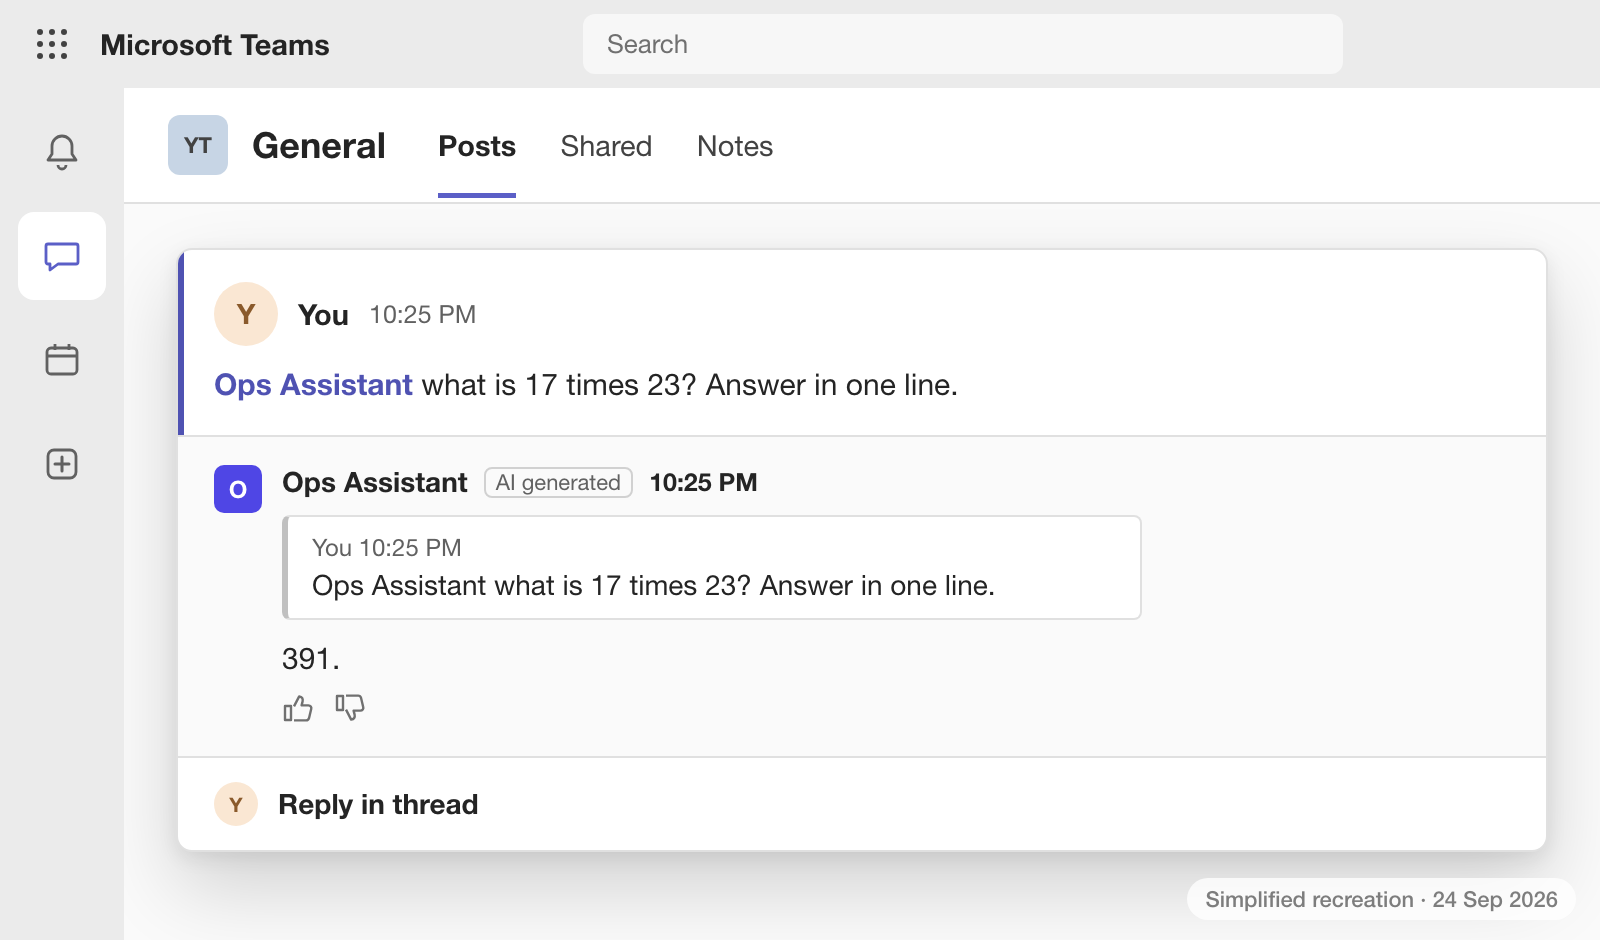
The agent only receives messages that mention it. It doesn't read the rest of the channel, and it doesn't see earlier replies in a thread unless the message that mentions it includes them. That keeps the permissions IT has to approve to a minimum, at the cost of some context, so put what it needs in the message itself.
Everything else is the agent you already have, with the same instructions and the same connected tools, answering in one more window. Teams becomes another place where people message the agent, which is the direction that works.